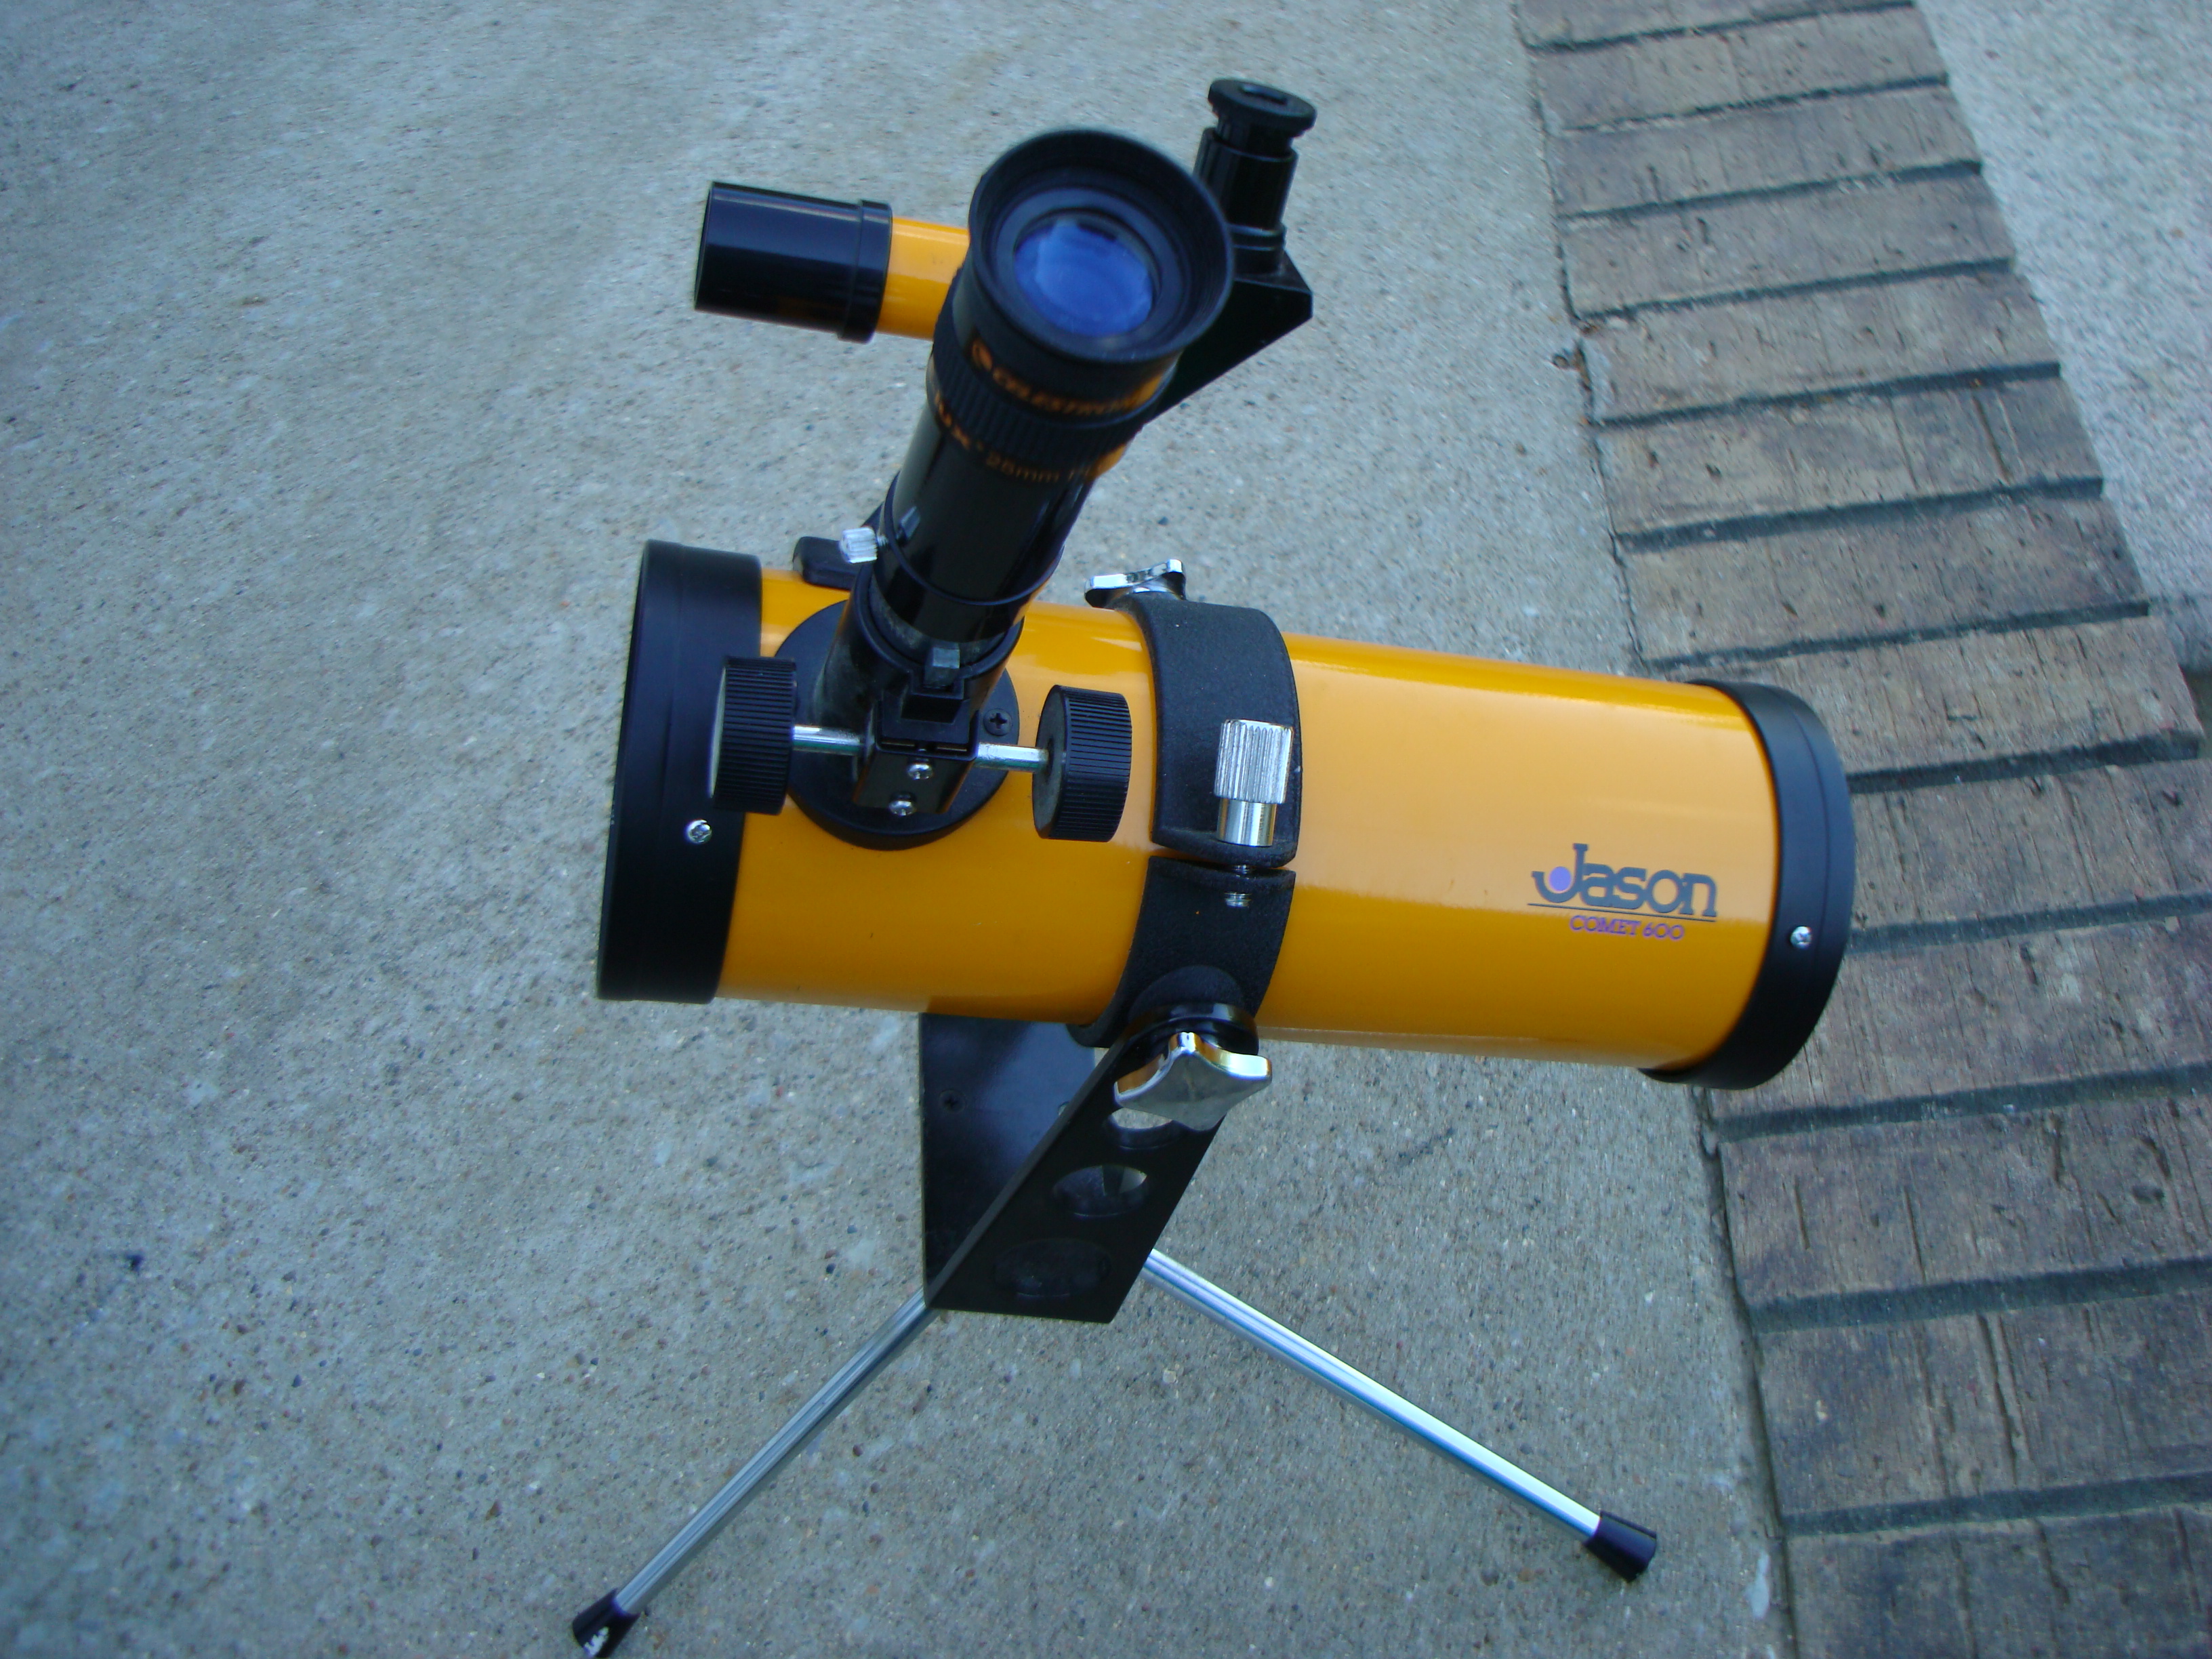
I have one of these little tabletop newts, cute as a speckled puppy. It was a gift from some friends down the road, they are aware of my astronomy problem, and they had this little scope that wasn’t being used, so they donated it to my telescope addiction. Now the thing is, I have been trying to evaluate this little scope recently, partly because it looks kinda fun, and partly because I was thinking of offering it up for sale (too many toys, not enough time to play with them all). Anyway, I have done multiple internet searches looking for specs, and assembly instructions, and not finding anything that answered any questions I have, (common problem for me) I decided to post my ordeal here, just in case someone picks one of these up at a yard sale and has questions, maybe this will show up in a search engine…
Note: They do not come with the eyepiece pictured. This scope had some sort of accesory in the box that affixes to the focuser on one end and the other end just happens to be the exact thread on my 1.25″ plossl eyepieces. You have to remove the barrel from the eyepiece to reveal these threads. The plossls are a huge advantage over the original eyepieces and there is enough focuser movement to bring them to focus.
I took this thing apart, cleaned up the optics, and put it back together a while back, but never got around to trying it out till just recently. I took it out a couple nights ago, with a gibbous moon above, that was my first target. The image was ok, a little soft, but no doubt it was magnifying the moon fairly well. Saturn was tiny, but identifiable as a planetary orb surrounded by the ring structure, no ring detail visible. With this aperture, and magnification I wasn’t expecting much, but the image just wasn’t sharp as I thought it should be, it was a little fuzzy. The image issues had me concerned so I took the scope apart to investigate.
A quick rundown on this scope, and others like it. They are Newtonian telescopes with a plate glass covering (imitating but not functioning as a Schmidt Cassegrain) This glass plate is really just a holder for the secondary mirror, and an effective dust cover. This particular model sports a 76mm mirror with a 600mm focal length. The primary mirror is the light gathering mirror, the secondary mirror reflects this gathered light back up through the focuser tube, so the eyepiece can magnify the image. Also worth mentioning there is a barlow lens in the focuser tube on these little rascals, usually a design you want to avoid, but hey did I mention how cute it is?
The primary mirror in these scopes is fixed, no adjustments here. The secondary mirror has collimation screws, but I didn’t know if they really worked like they should, or if they were just for show. Anyway I looked down the focuser tube (with no eyepiece in place) and noticed the secondary mirror was twisted around such that 20-25% of the primary mirror reflection wasn’t even visible. Problem identified. If you can’t see a round image reflection of the primary mirror, looking down the focuser tube, the secondary mirror is misaligned and you are not getting full delivery of the light gathered by the primary. It is effectively reducing aperture, and causing a misalignment that will cause a fuzzy image at the eyepiece. So I had to disassemble the front end of the scope, by slowly taking apart the secondary assembly. I discovered in the process, that indeed the collimation screws do function as they should.
Note: the next 3 pics will be known as pics 1, 2, and 3.
The secondary assembly (pic 1, right smack in the middle of the tube) consists of the main body that has the collimation screws on the outer side and a retaining ring with a set screw on the backside that tightens up to hold it in place against the glass plate (pic 1 and 2, front/back side view). This mirror anchor so to speak is held in place by the aforementioned retaining ring. There is a phillips head screw that screws in from the front side of the main body, which holds the secondary mirror adjusting mechanism in place (pic 1). The secondary mirror itself has a small phillips screw to hold it on to the collimation adjustment mechanism, the mirror is housed in a plastic mount that is removable by that small phillips screw (pic 3). I hope that all made sense. Try looking at the pics for clarity.

To rotate this entire secondary body as a unit, I backed out the tiny set screw in the retaining ring, (pic 2 underneath the secondary mirror close to the glass plate is the small standard screw head) but could not get a grip on the ring from the back to loosen it, or turn the body from the front. It was pretty snug. So I backed out the collimation screws (allen heads, front side, pic one, the 3 screws surrounding the phillips head) so that I could take a flat edge and use the screws as leverage with one hand, and using the other hand to hold the retaining ring as I turned the flat edge against the protruding collimation screws so it could pop loose. That worked. Leaving it still pretty snug, but loose enough to turn, I put the whole unit, secondary, glass plate and metal frame over the end of the scope tube. Then aligned the secondary by eye, slowly turning the secondary assembly with my straight edge leveraged against the collimation screws, while looking down the focuser tube, until a circular view of the primary mirror was visible and centered. (I don’t have or even want to look for specific tools for this thing, and I have a pretty good eye, this ought to be good enough) Then I removed the entire assembly from the tube and snugged down the retaining ring as best I could, and tightened up the set screw.

Note: to do this as described, this is basically a rehash of the last paragraph, maybe this one will make more sense. You have to place the entire front assembly (the secondary mirror and the glass plate are both attached to the round metal frame that is held to the tube by 3 small screws) over the end of the tube. Then line up the the screw holes, where they attach to the tube (see close to bottom of pic 2 below for one such hole). Then rotate the secondary mirror with the flat edge so the primary mirror reflection is perfectly round and centered in the focuser tube. Make sure that outer metal edge didn’t rotate away from the screw points on the tube. Once your alignment is good, then pop the entire assembly back out, and tighten up the retaining ring to snug the secondary back in place. Take care not to let the secondary rotate when you do this or you will have to align the mirror again.

Now after all of this, the collimation screws were completely out of whack and still protruding out into space. So I slowly screwed them back in and snugged them up by eye, getting it as straight as possible (see pic 2 above, note the equal distance between the bottom of the secondary mirror holder and the retaining ring) before attaching it all back to the tube. I have a laser that is made for collimating telescopes, but it is useless in this situation, this small scope has .965 eyepieces and modern eyepieces and tools are 1.25″ or 2.00″ Lasers are mostly good for just getting “pretty darn close” anyway, the best way to collimate is with a star. So I waited for nightfall.
First look was the moon. Not bad, but off. So I picked out Vega* (bright star in the constellation Lyra) and defocused the image in the eyepiece until it resembled a bullseye with a dark spot in the center. The bullseye rings (only a couple of them with this scope and this magnification, with the supplied 20mm .965 eyepiece) were a little lopsided. It was a matter of trial and error here slowly adjusting the collimation screws until the bullseye was as close to uniform as possible. The result? Well, that fuzzy Saturn is sharp now. Stars are pinpoints, and this little scope is ready for some fun.
For serious telescope nuts, the intrafocal and extrafocal bullseyes varied by a large amount. So I just adjusted this thing by essentially splitting the differences. The end result is darn well good enough for this thing. It is not exactly a piece of optical perfection to start with, but the images it produces now are decent considering its aperture and design limitations.
The biggest drawback to this scope now is the finder. It is absolute junk. If I could rig up a better finder I might actually use this thing more than I do. Having an 80mm apo refractor on an easy to move mount, makes it all too simple to grab it, instead of this little guy when I’m out for a quick look. But when I am feeling more whimsical than serious about observing, the Jason gets the nod.
If I had a tripod, with an alt az head, and a decent finder scope on this thing, it might make a good little rig for kids. My kids are already quite proficient with my other telescopes though, so it’s really a toy for me… If you happen to run across one of these little rascals at a yard sale or on Craigslist, and if you can get it cheap enough, they are fun to play with, just don’t expect premium optics or a usable finder scope. The build quality isn’t terribly bad, and the tabletop mount takes some getting used to, but the worst thing about this scope design is the barlow in the light path, and of course the finder scope. I could maybe forget the barlow if the finder scope was usable.
Newtonian: or Newt for short: A telescope design using a primary mirror at the back, a secondary mirror up at the front. Usually housed in a solid tube.
Schmidt Cassegrain: is a telescope design using a refractive corrector at the front of the tube, and a primary/secondary mirror as in a Newtonian design.
Collimation: is the aligning of telescope optics, so that they perform as they should and at their best. There are many articles on collimation on the web, Google is your friend.
Aperture: is the amount of light gathering possible, by measuring the primary mirror in reflecting telescopes, or the objective in a refracting telescope. More is better.
Barlow: is a magnifying lens that increases magnification.
* Vega, usually when collimating a telescope you want to use Polaris, the north star. This star remains stationary in the sky, and is by far easier to collimate with. That said, the finder scope on these little scopes is barely usable, Vega is nice and bright, easy to find, and positioned so I could see it from the front porch, which required no extra hassles moving around and in situations like this I am a lazy S.O.B.